Using the
Flash Chip Programmer
Hopefully you ordered the
Flash Chip Programmer Option when you ordered your
system from John. This is an added cost
option that lets you flash your chip to an updated
profile based on what John see when you send him a
data log. Given the ease of making these changes,
coupled with John's expertise, it will be money well
spent. The only caveat is that you have to have a
laptop for the data logging.
What follows is a pictorial step by step
for removing the chip from the ECM to using the chip
programmer and software.
|
Chip and Plastic
Holder are gently pried up and removed from
ECM |
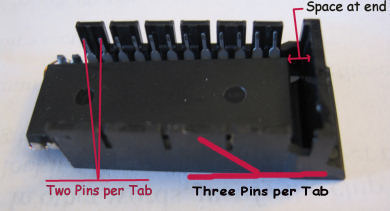
Flip Plastic
holder over and note how the pins line up
with the plastic tabs: 2 Pins to a tab on 1
side and 3 pins to a tab on the other side |
 |
 |
|
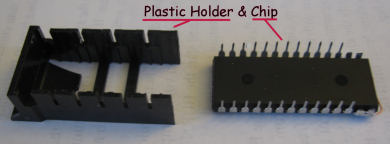
Separate the Chip
from the plastic holder. It's just held in
by pressure, basically a tight fit, but
nothing locking it in place. |
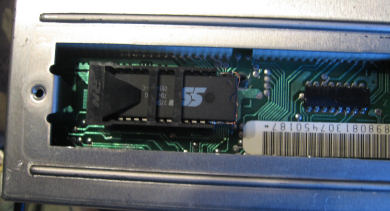
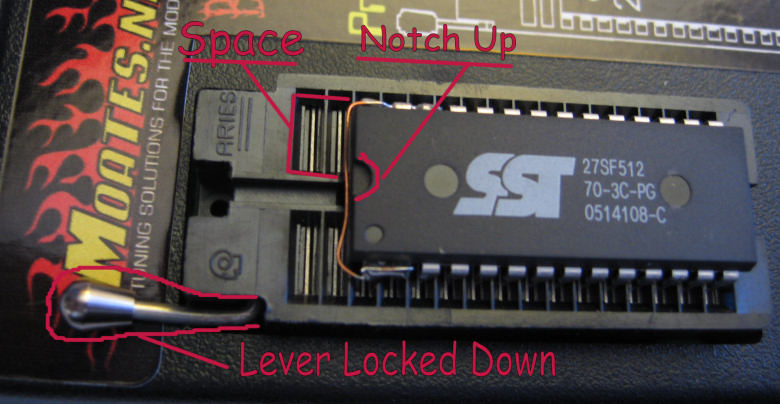
Chip in Flash
Burn device. Note the orientation of the
chip notch and the 2 slot space at the
top/left. Make sure you raise
the lever to insert the chip and then
lock it down to secure the chip. |
 |
 |
If you haven't already
done so, go to www.moates.net and download the
software for the BURN 1 device. Then download the
updated USB drivers for the BURN 1 device. Once you
have the software installed on your computer,
connect the BURN 1 programmer to the computer with
the supplied USB cable and your PC should recognize
a new device connected to it. Once it says that the
device is ready, start the BURN 1 software. It
should recognize the programmer and bring up a
screen for programming the chip.
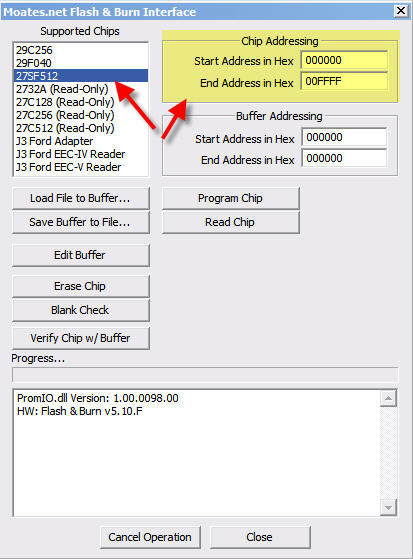
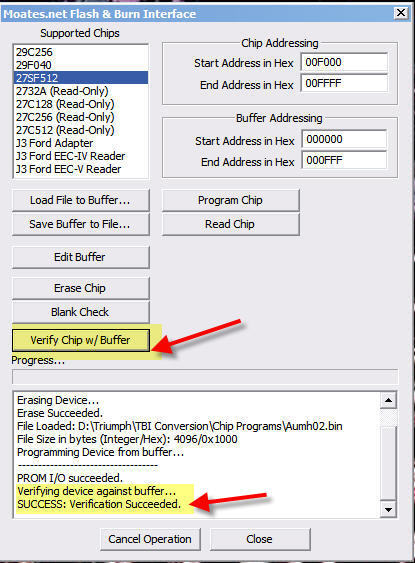
Step 1: Select
the highlighted Supported Chip and make sure the
start and end addresses match what's shown in the
Chip Address Field
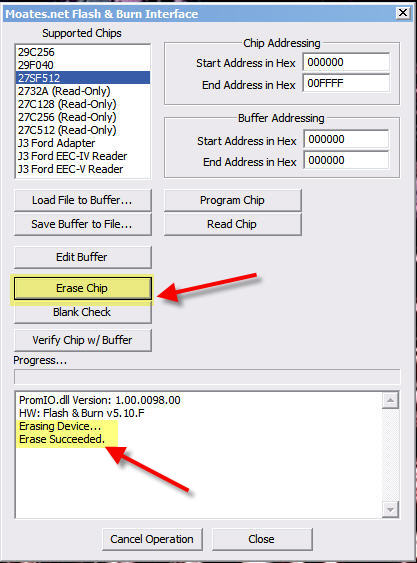
Step 2: is to erase the existing
program on the chip. Just click the Erase Chip
button and you should see Erase Succeeded in the
window below.
Step 3: Click the Load File to
Buffer button which will open a Select File screen.
Navigate to where you've saved the file John emailed
you. Once you've found it, select it and click Open.
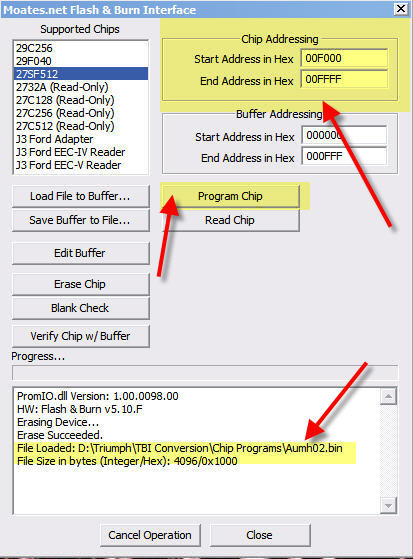
Step 4: Change the Start & End
addresses in the Chip Addressing field to the
numbers shown. Confirm that the correct file from
John in identified in the Window below. Once you've
done that click on Program Chip button.
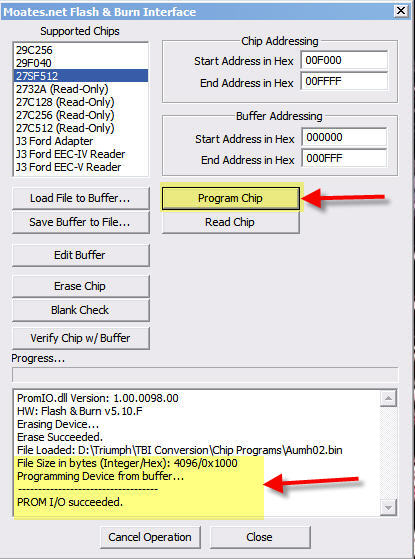
Step 5: After you click on Program
Chip, you see the flash progress happen in the
window below followed by the PROM I/O Succeeded
message.
Step 6: Id you want to double
check everything, click on the Verify Chip button
and look for the Success message in the window.
Now it's time to remove the
chip from the burn device. Raise the lever to a vertical
position and lift out the chip. Snap the chip back in
the plastic holder and insert back in to the ECM.....see
pictures at top of page. Start the car, go for a spin
and see if you can notice any improvements with the new
program. They may be very subtle or somewhat extreme
depending on what has done. Do another Data Logging
session and send it off to John for another review.
|