|
Top Mounting Bracket
Now that you've got the bottom
bracket finished and the alternator mounted to it, you'll find that the original
top bracket doesn't fit. So head on down to you favorite auto parts store and
get one of those big arched chrome after-market brackets made for GM cars. I
found mine at Auto Zone for $10.
One thing I was glad about was that
the stock fan belt fit just fine. That was a concern of mine as I don't have
sufficient clearance between the steering rack and pulley to remove the belt. I
was prepared to loosen the engine mounts and jack the engine up, but.......... I
don't have to!!
Click on any picture for a
full size picture. All the full sized pictures are about 75 - 100K in size.
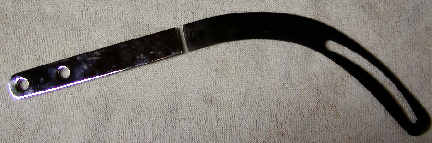
Here's what the bracket looks like
when purchased.... not really but you get the idea. You can see the original
chrome section on the left and where I've cut it to size.
This shows the the bracket with all
the chrome sanded off in need of new paint.

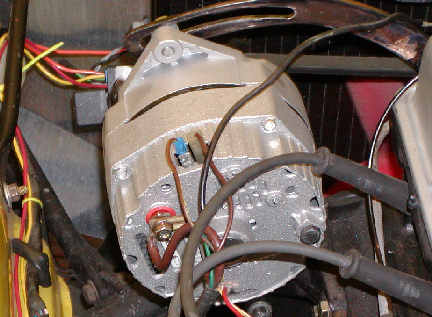
Here's a view from the back. As
you can see, the electrical connections are temporary for testing purposes and a
test drive. They'll all get changed out when I install Dan Masters' wiring
harness.
So basically that's it. My volt gauge
is now pegged over close to 15 volts regardless of what I have running. I put my
multi-meter on both of the output terminals and getting a steady 14.5 volts at
the alternator. Now that this is complete it's time to start installation of the
new wiring harness and power block.
Total Cost:
Duralast Alternator (DL7127 12M 63
Amp) from Auto Zone:
$40.00 plus $15.00 core charge ($55.00 Total)
Chrome Top Bracket from Auto Zone
$10.00
Mounting Bracket from Victoria
British $34.00
Dan Masters' Wiring Harness Installation
Back to Bob's TR6
Home Page
|


