Now that I've made all my
own interior panels I figured it was time to try and
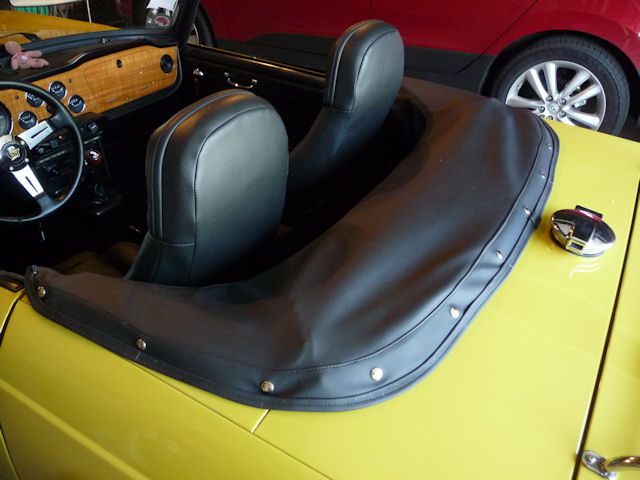
tackle the boot cover. In looking over my ancient
existing one that's all cracked and has been painted a
few times I decided the only thing I had to lose was
about $15 of material. Once I had it finished, it was
"OK", not great but sure worth the $15. Then I decided
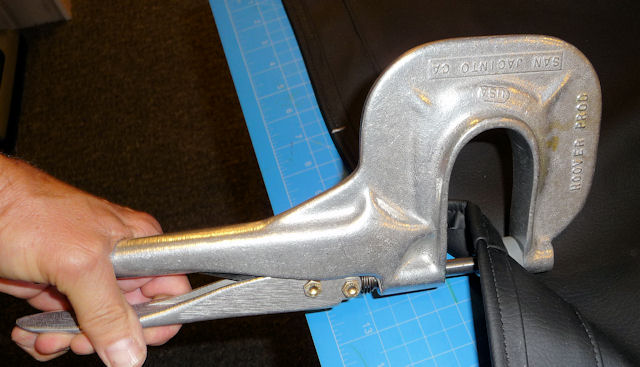
to get the Pres-N-Snap tool for installing grommets and
snaps and that set me back $100 and add on $50 to
McMaster for grommets and snaps and I'm in this for
about $170. So I may have to sell this one to recoup my
investment! BTW.............the tool is worth every
penny! The only mistake I made is that I ordered #2
sized grommets and the tool comes with a die for #1
sized grommets. The only reason I need grommets is for
my wind blocker which requires two bolt holes through
the boot cover.
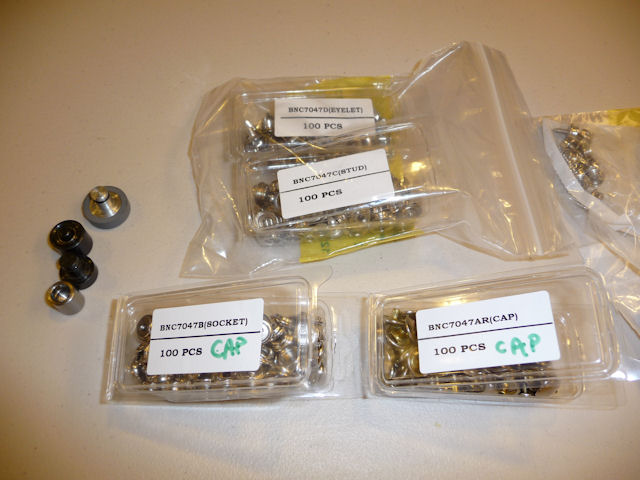
The Pres-N-Snap
Tool - It comes with 3 sets of dies: Snap
Cap, Snap Stud & Grommet
Two set of dies
on left and my McMaster order in bags.
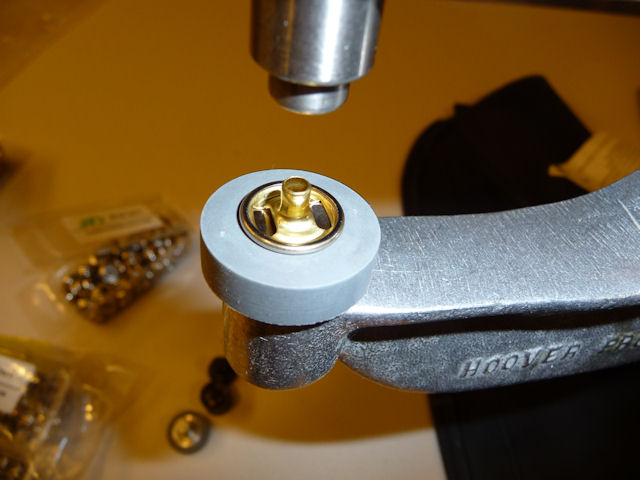
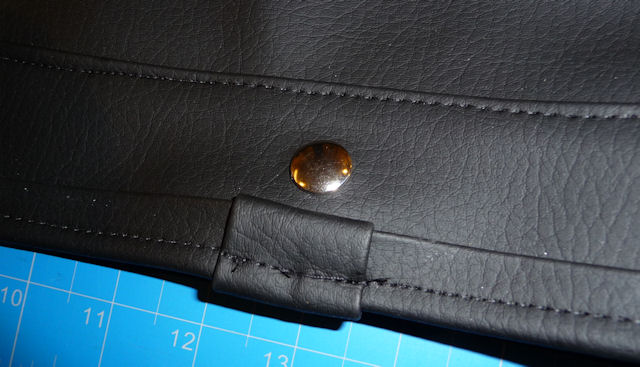
Here's a Snap Cap
resting on the top die
Push it down and
it the rubber piece holds it in place
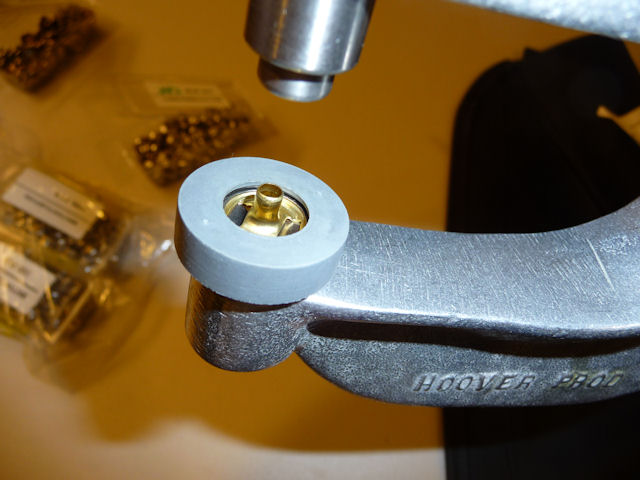
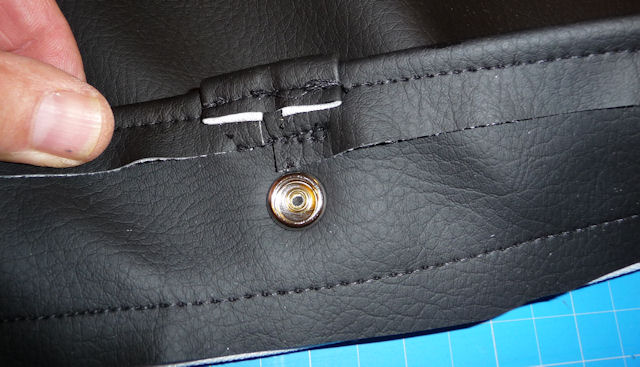
The Snap Socket actually snaps on to the
bottom die. Nothing can fall off.......it's
a one handed operation.
No Pre-punched
holes required.....just position and squeeze
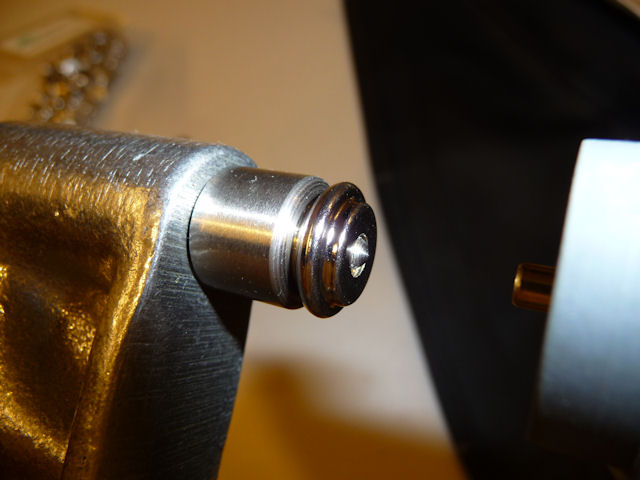
The Snap Cap
The Snap Socket
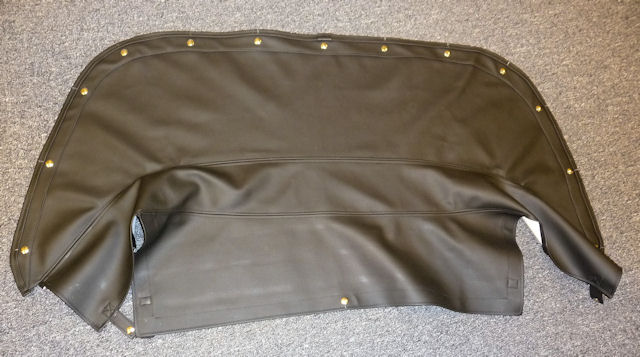
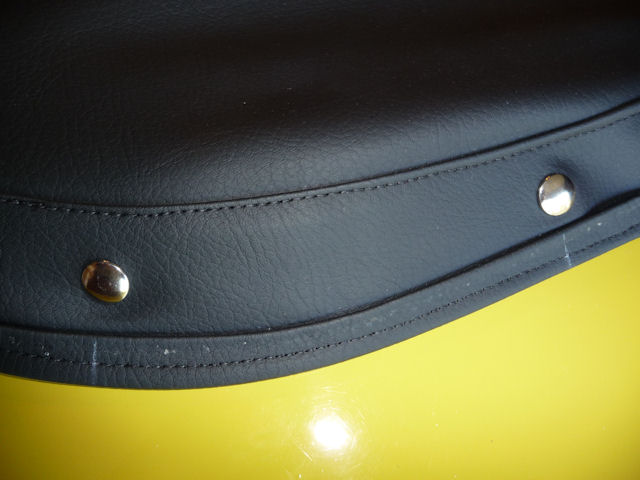
There's 17 snaps on a boot cover and this
took all of 5 minutes to do once I had the
locations marked. Every one came out
perfect.
Perfect fit on
the car.
Chalk marks are
still there marking the snap locations
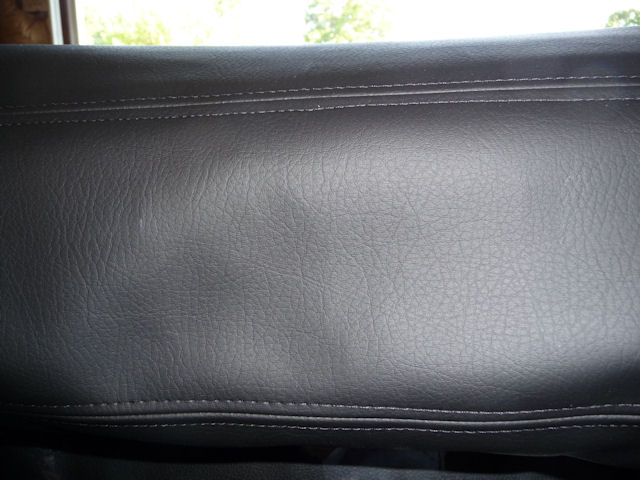
Instead of using
piping I went with this stitch that I like
better.