|
CVJ Kit
CVJ Install Plunge Test
Test Drive
Test Drive Time
The Blind
Moose Conversion is finally finished so it's time to wrap up
the CVJ installation and take a test drive. First up was hoping
that there would be no problem with the fit of the Brembo alloy
drums. But, as you can see below, the fit was perfect.
|
Here's
the brake drum back on the hub and the fit is
perfect! |
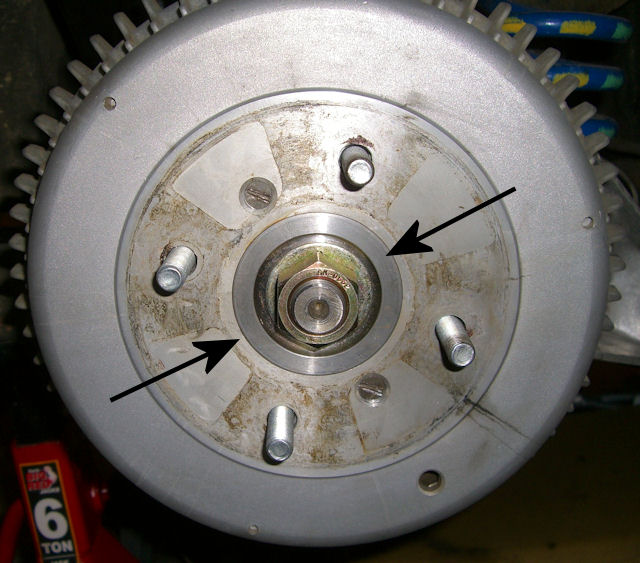 |
So basically, that's all there is
to this conversion with the exception of torquing the locking
axle nut to 220-250 lbs! Apply some red Locktite, grab a 1-1/4"
socket and tighten away. Easier said than done! First I threaded
the axle nuts on by hand until they bound up and finished with a
regular socket wrench. Then I had my wife stand on the brakes
while I tried to crank the torque wrench to 220+ foot pounds.
I'm pretty sure I saw the needle swing to 220 a few times so I
hope I'm good to go.
Test Drive Time!
Yea.... well except for one other
little "problem" that cropped up during the first test drive.
There I was cautiously driving at low speed, listening and
smelling for anything unusual after having the whole rear end
out of the car all winter. Everything was fine until about 10
minutes into the drive when I decided to take off quickly from a
stop sign.........and then......RAT-A-TAT-TAT coming from the
area of my right hip. It only happened under hard acceleration
in 1st and 2nd gear........then it went away. I wasn't overly
concerned because the sound wasn't anything mechanical. It was
just a sound....noise.....as if something was hitting something
it shouldn't. The next time it happened I put my hand on the
back of the drive shaft tunnel and could feel the sound as it
happened........followed quickly by the "Ah-Ha" moment. During
installation of the diff, I noticed that the drive shaft u-joint
that connects to the diff nose flange was close to the tranny
tunnel wall. I rotated everything and thought there was plenty
of clearance. Hopefully I was wrong and this was the problem.
The next day, I got the rear end back up on jack stands,
loosened the diff and moved the nose about 1/8-1/4" to the left.
Now I could see where the u-joint was hitting the tunnel wall.
What ticks me off is that I remember having the same concern
last year when I first installed the diff and actually did move
the nose over. Luckily it was a fairly quick and easy fix and I
was back on the road testing it out again. This time everything
was perfect! No Rat-A-Tat-Tat and no clunk like I had all last
year. My clunk guess is that the splines on my old half shafts
were probably worn. An added benefit is that I also have new
upgraded hubs. My old hubs were the last big unknown on my car
and I wouldn't be surprised if they had never been rebuilt.
My initial driving impression is
that everything is smoother and quicker or maybe I have to think
that.......after having spent $1500 on this upgrade! In any
case, I'm happy with the result and look forward to the coming
driving season.
|


