|
Adjusting Camber with the Kit
Before attempting to adjust my
camber I emailed Richard Good with some questions as to the
proper sequence and procedure for making any adjustments. So
here's what he recommends:
- Find as level a spot as you
can.
- Jack the rear end up.
- For everyday driving 1/2 to 1
degree of camber is fine.
- DO NOT loosen the bracket
bolts to the frame.
- ONLY loosen the nut on the
pivot bolt.
- Make sure the pivot bolt
isn't binding
- It is best to wiggle the ear
of the trailing arm up and down a bit using a screw driver
or pry bar hooked on top of the lower frame bolt. This
makes sure the tension is off the pivot bolt making it easy
to turn the adjuster.
- Make your adjustment
following
the kit directions.
- Follow step #7 and Tighten
the pivot bolt BEFORE lowering the car.
- Roll or drive the car to
"set" the suspension.
- Measure camber and adjust per
steps above if necessary.
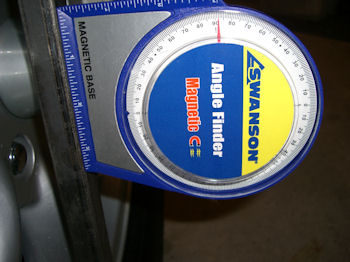
Before jacking the car up I found
a nice level spot in my garage and decided to measure the camber
as it sat before making any adjustments. I had a square section
of steel tubing that I cut to hit the top and bottom of the rim.
Then I had a carpenters magnetic angle finder which shows
degrees on a scale. I had been "eyeballing" the wheels and
thought they looked about the same with just a little negative
camber. Previously my car had some serious negative camber,
maybe 5 degrees or more. So after looking at that for 10 years,
the current configuration looks quite different. So........much
to my surprise, the two wheels measured between 1 & 2 degrees.
Seeing as my garage floor isn't perfectly level, I figure they
are both around 1 degree. No need to make any adjustments!
If you don't have any angle
finder,
Buckeye Triumphs has a nice explanation of how to measure
and make the necessary calculations. And if you really want to
get into suspension geometry, they have
a great article here.
|
The
square tubing & angle finder are available at most
hardware stores or big box stores. |
 |
 |
|


