|
CVJ Kit
CVJ Install Plunge Test
Test Drive
CVJ Plunge
Reserve Test
Now that the axles and differential were all
installed it was time to make sure there was sufficient reserve range of movement. This
consisted of raising the hubs up against the upper bump stop, taking some
measurements, and then lowering everything and taking some more measurements. If
you still have lever shocks, the test is different from the one I did.
The directions tell you to use a jack to raise the
trailing arm up until it hits the upper bump stop, but after doing it this way I
found that I could just lift it to that position.
| The jack was needed to
hold it in position. |
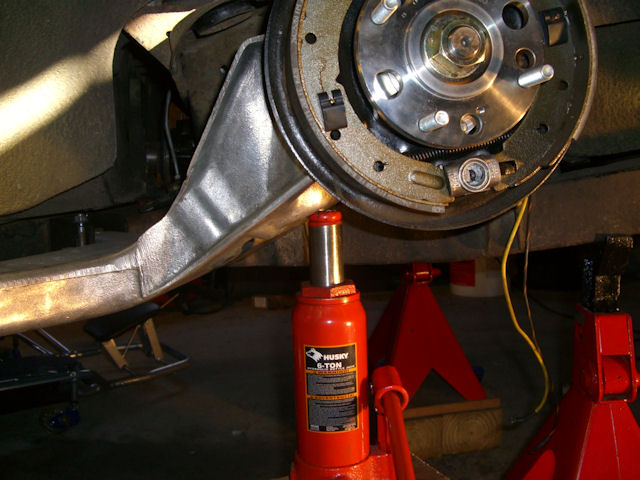 |
| Touching the upper
bump stop. |
 |
I unscrewed the axle
nut to the last thread and measured from the washer to the nut.
I had 3/4" and then I pushed the whole axle in to check the plunge
depth. |
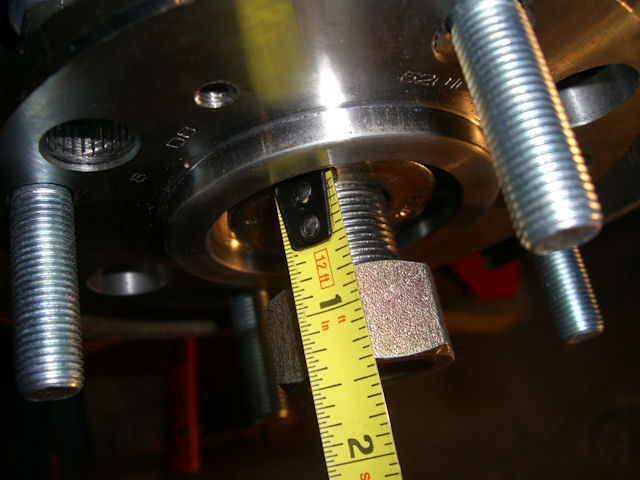 |
As you can see, the
nut is now against the washer so I used the whole 3/4".
You need a minimum of 1/2" of plunge range. |
 |
That tested the plunge reserve range
at the top of suspension travel. Now you have to test the bottom reserve
range which is done a little differently. Tighten that axle nut down again and
make sure your shocks are also tightly secured to their mounts. Now you let the
hub assembly drop to the bottom of its travel as determined by your shocks. When
I did the left side I discovered where my annoying squeak was coming
from......it's the left shock.....and for the past year I've been blaming the
Nylatron bushings. So, of course, this resulted in a shock upgrade and the
Blind
Moose conversion kit. That's being documented in another section of my site.
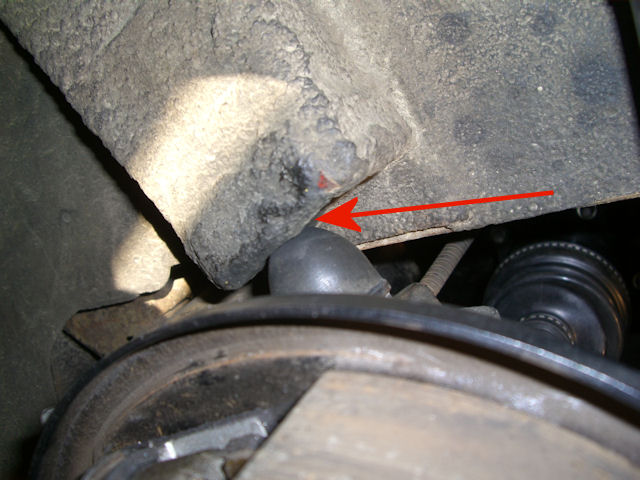
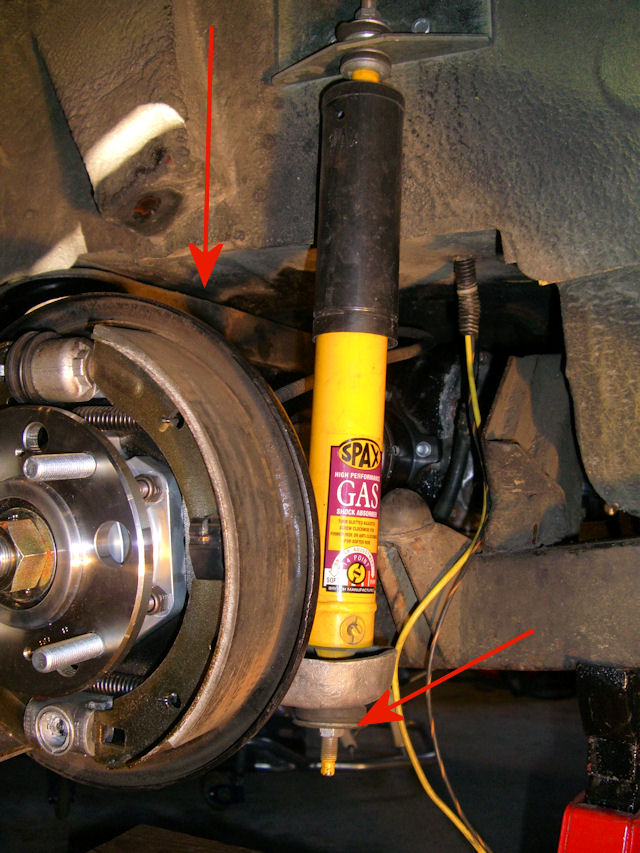
The
hub has dropped as far as the shock will allow it.
The bottom red arrow showsthat the shock is still
attached to the Trailing Arm |
 |
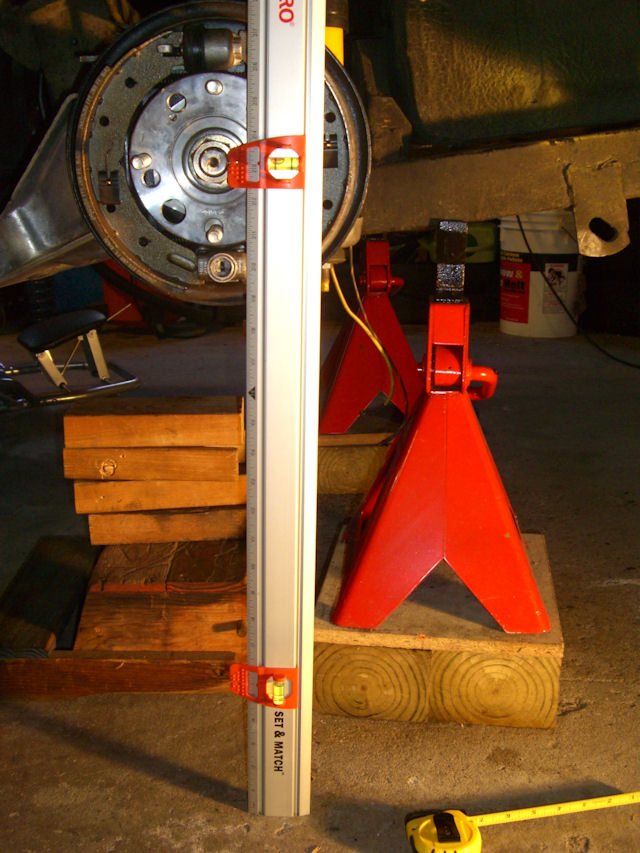
Now
you measure from the center of the axle to the
floor.
BTW.... this little level is a must have for hanging
pictures with two hooks! |
 |
Now that you've taken the first
measurement, remove the bottom nut that holds your shock to the
trailing arm and let the assembly drop by itself as far as it
will go.............DO NOT manually force it down or try and get
it to drop more after it stops. You can damage the CVJ if you
do.
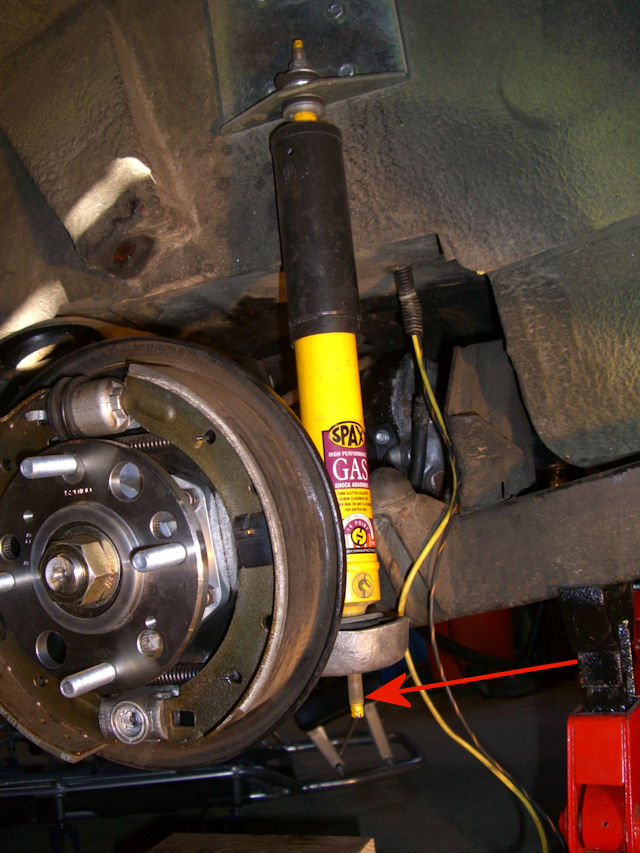
The
arrow shows that the shock is not longer attached
and
the whole assembly has bottomed out. |
 |
Now
you measure again and determine how far the axle has
dropped. The difference
between the two measurements is your plunge reserve
range at the bottom |
|
|
The instructions call for a
reserve at the bottom of 1" but I only came up with 1/2 - 7/8"
depending on how I had the hub rotated. You actually rotate the
hub and take a few measurements. I emailed Richard and he wasn't
overly concerned with the bottom reserve as it only comes into
play if you have the car jacked up and the shock disconnected
which would force the assembly down to the full extent of its
range......... or maybe if you like to fly over hill crests and
get airborne!! The top reserve is the more critical one as you
are more apt to bottom the car out and hit that top bump stop.
Plus..... the Blind Moose conversion and new shocks may change
the measurements.........so I'll be doing this all over again in
another week or so.
First Test Drive is
next!
|


