Miata Seat Installation - Sept '09


Installing the Seats - Making Your Own Brackets

You have a couple of options with regard to seat brackets: make your own or buy a set from Joe Alexander...........and I've now done it both ways.

The section on making my own brackets is below while the installation of Joe's brackets can be found here.........A.R.E. Seat Bracket Installation.  Given the option, go with Joe's brackets and save your self a lot of aggravation! But if you're a glutton for punishment...............read on.

Some guys just drill new holes in their TR6 floor to match the Miata rail mounts, but I figure there's already enough holes in the floor. One of the 6-Pack Forum members, Kyle Rice was kind enough to share with me his solution, so I worked from that and added my own modifications.

NOTE: Joe Alexander and his son Sean are now producing the custom brackets which will make installation a whole lot easier. I recently got a set and have posted the installation of them here.
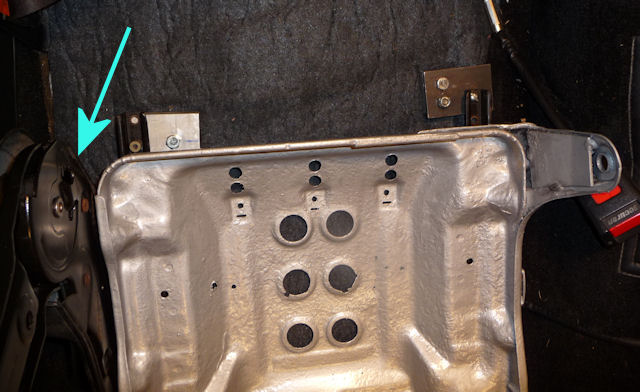
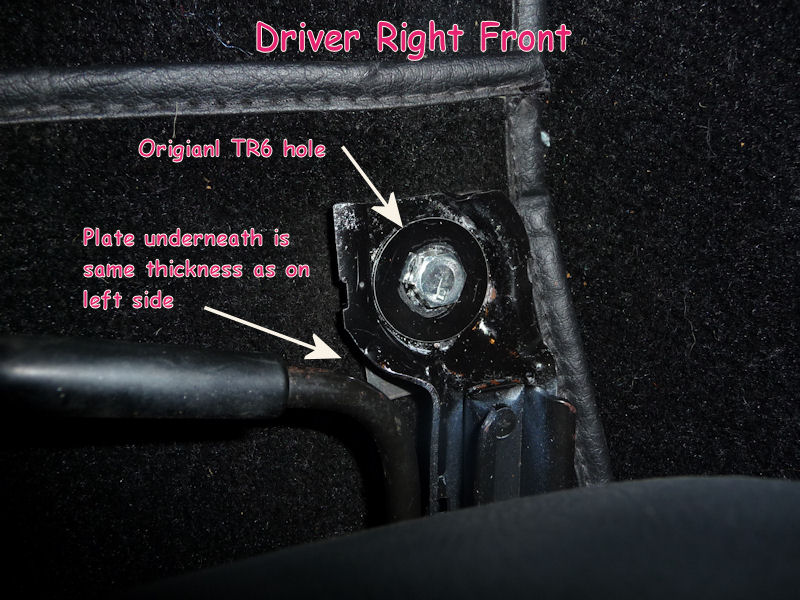
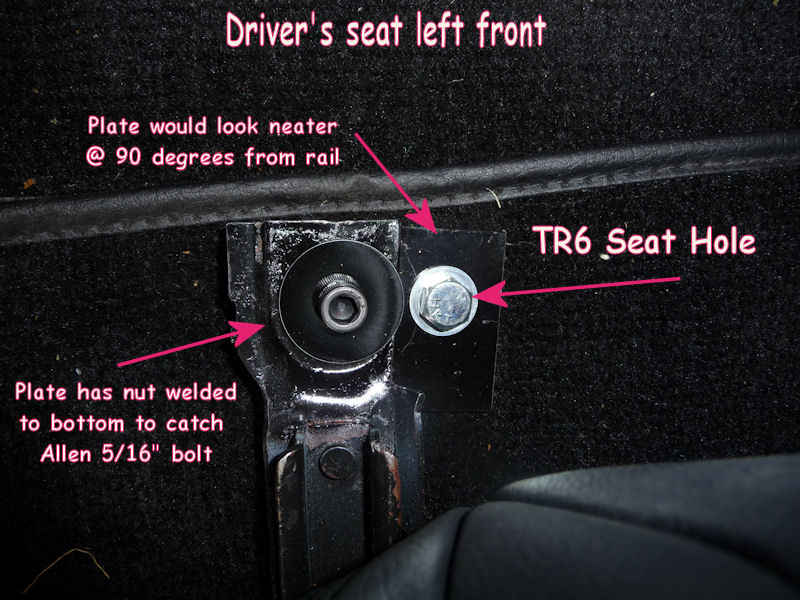
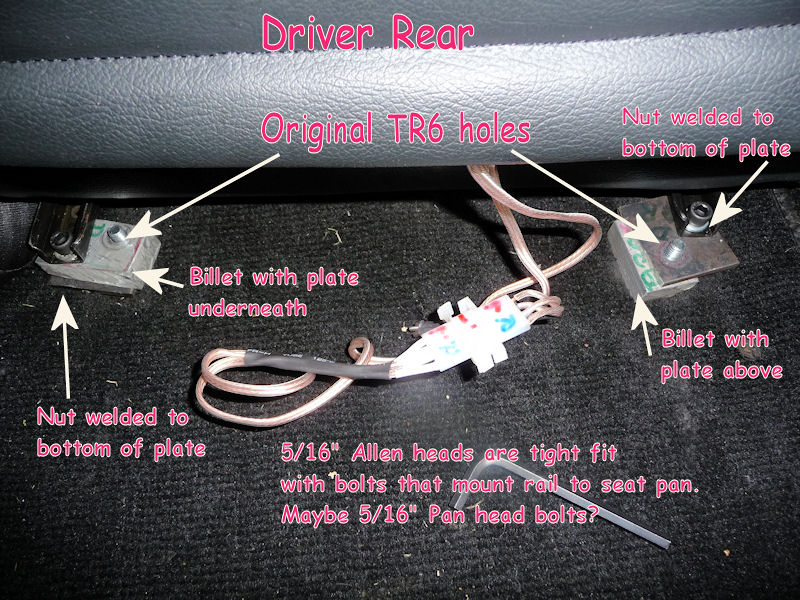
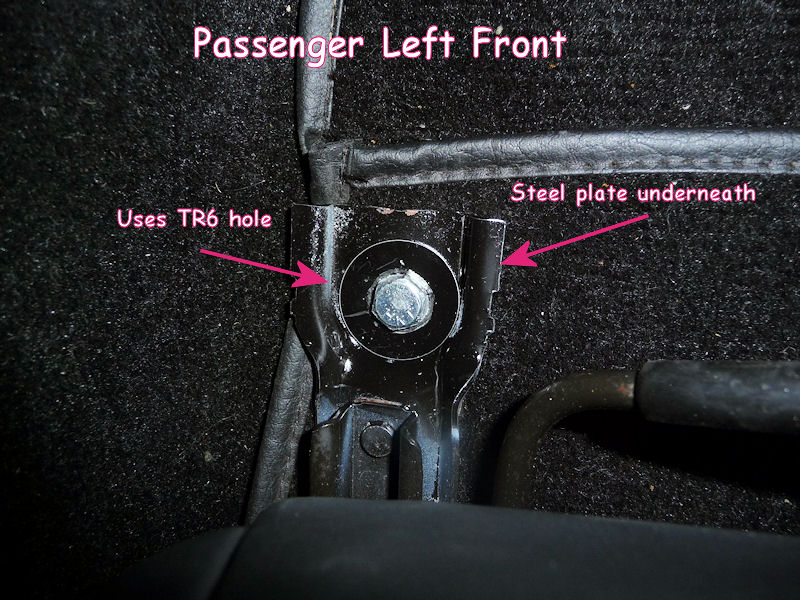
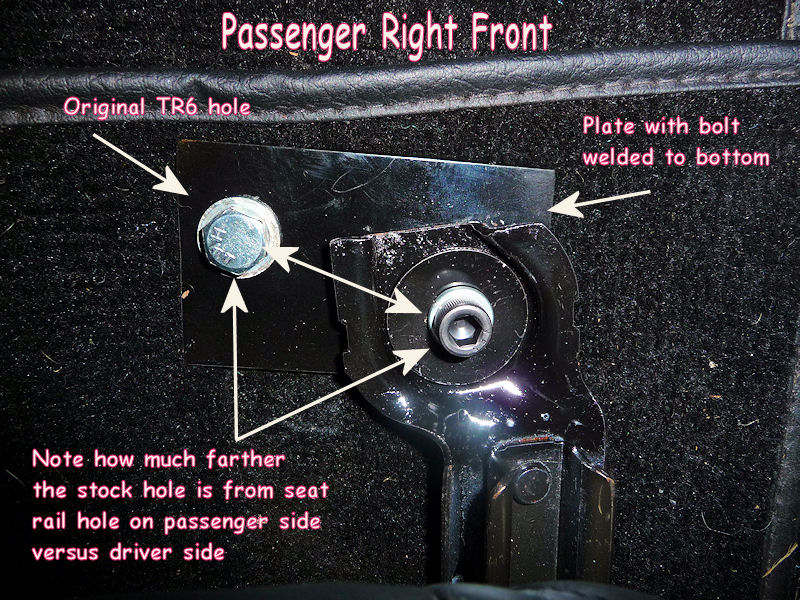
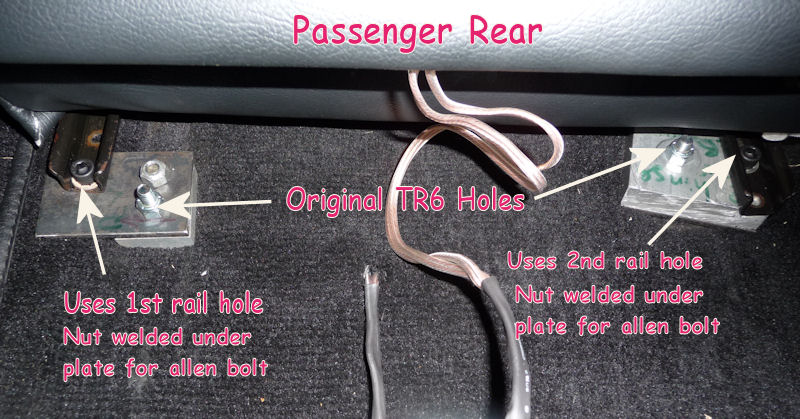
The challenge is twofold: the brackets have to positioned "perfectly" 
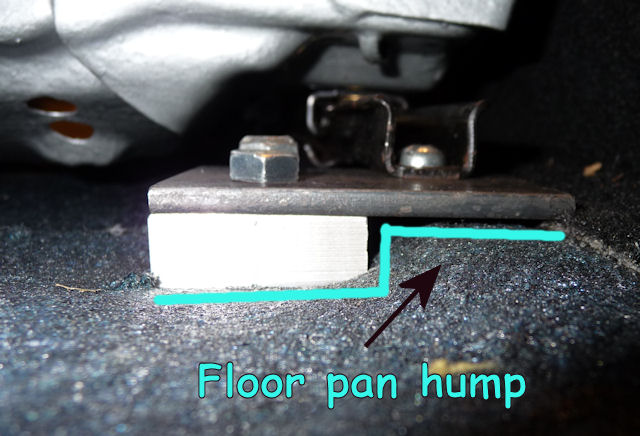
or the seat won't fit, and you have to accommodate a 
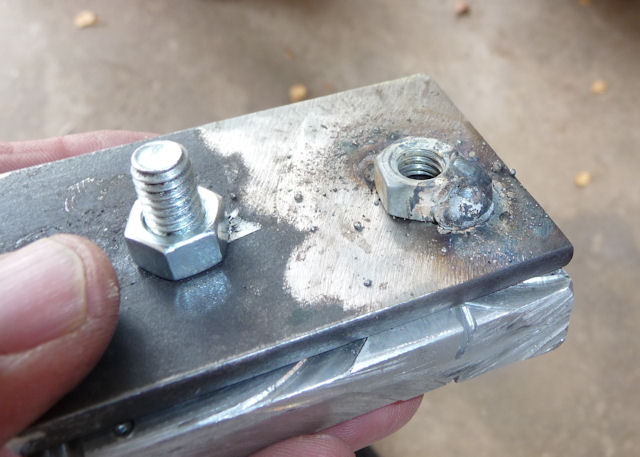
raised section of the TR6 floor pan. Here's my temporary set of brackets which will get replaced with something permanent over the winter. As you'll see, I used a mix of 1/2" aluminum billet and 3/16" steel plate.
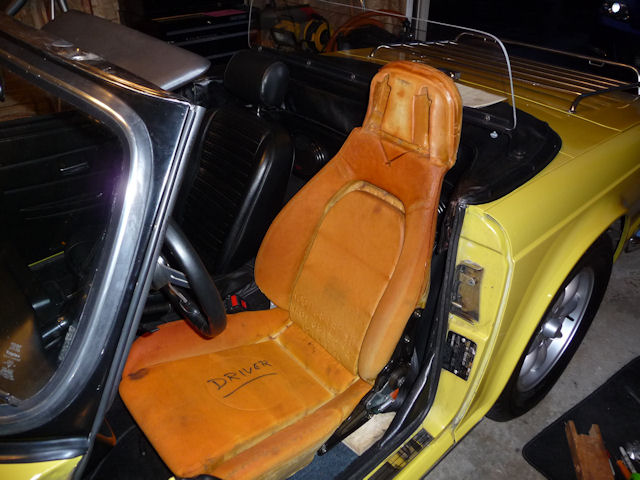
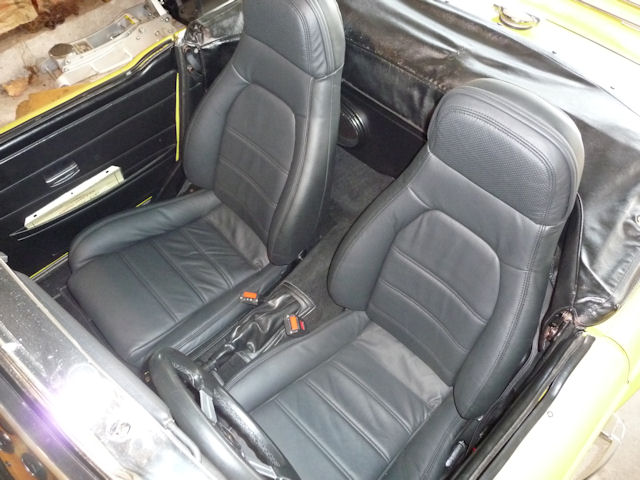
My welding leaves a lot to be desired so I only do it in non-life threatening situations! In this case I needed a way to secure the Miata rails to the brackets and a blind nut approach seemed to be the best way.
I did all of my test fitting with the empty seat pan and just the tilt mechanism (arrow) attached. That gave me the proper total seat width.
I started with the Driver front right and used the original TR6 mounting hole. The steel plate underneath is to keep it level with the left front side which needed a steel plate to reach the stock mounting hole.
This is the Driver right rear and the same scenario applies to the passenger side left rear. On both sides there is a bump in the TR6 floor pan right along the tranny tunnel. The stock TR6 seat rails sit on the floor next to the bump. My first thought was to run the seat rail straight back to the stock mounting hole but a test fit of the seat pan didn't work. So the Miata seat rail sits on top of the hump and uses a cantilevered bracket arrangement for BOTH driver and passenger rear bracket next to the tranny tunnel.
Once I got the inside rear bracket positioned, I went to the Driver side, left front bracket. This uses a section of steel plate to catch the stock mounting hole. Note how close the two bolts are to each other. Look closely and you'll see that I had to trim the right side of the seat rail get it to fit.
Here's a look at the rear of the driver seat with the brackets all in place. A couple of things here to note: you can't get a wrench or socket on the bolts in the seat rail so I used Allen head bolts that went through the brackets and caught the welded nut. I ran bolts up from under the car to catch the brackets. You can see the bolt end coming up through the brackets......much easier this way. The last thing is that you need to raise the seat at least 1/2" in the rear to get the seat pan off of the floor, so the use of billeted aluminum was perfect.
Just like the driver side, you start with the inside front bracket and use the stock mounting hole.
The passenger right front mount is farther from the stock mount hole then it is on the driver side. I never measured the rails when mounted on the seats but they have to have different spacing.
The rear is pretty much the same as the driver side except for the outside rail which catches the second rail hole. The inside mount is cantilevered and sits on top of the floor bump.

A test fit and short drive showed that everything fits just fine.

That's the end.........enjoy your Miata seats.