Not too long before
his
untimely death, Jack Drews (aka Uncle Jack) worked with Sean
Alexander to develope custom brackets to make fitting Miata seats to a TR6 a whole lot
easier. Jack's good friend and racing compadre Joe Alexander and
his son Sean are now making and selling these brackets in small
production runs. This is a great design so
drop Joe an email to ask about availability and cost.
The kit
comes with all the necessary hardware for attaching
the brackets to the Miata seat rails with no
drilling of any new holes required. The brackets are
made to re-use the existing TR6 seat mounting holes
and bolts. The only bolt you may need to source is a
slightly longer one for the inside front mount. Joe
doesn't supply this bolt as he doesn't know if
you've tapped out your original mounting threads to
a new size or a coarse thread. In my case, all of my
mounting holes are now 5/16" UNC instead of the
stock 1/4" UNF.
Before
starting your installation, read this whole section
through to the end where I offer a few
suggestions/tips to make the installation even
easier.
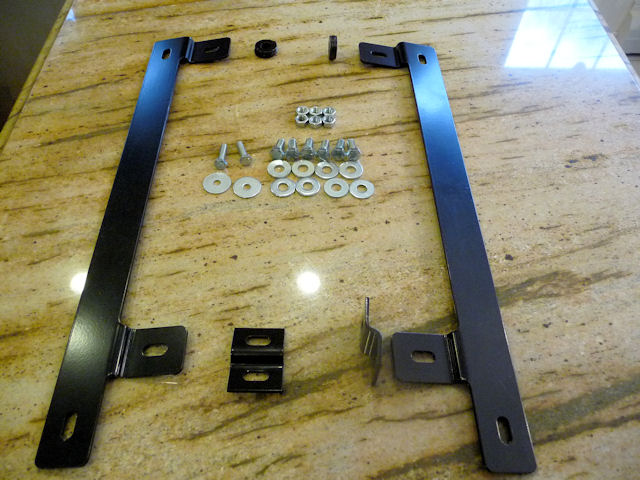
The kit contents: Each seat gets one long
bracket, one short bracket and one spacer
plus assorted nuts and bolts.
The brackets are
1/8" laser cut steel, pressed to shape and
powder coated.
Here are the
pieces all laid on on the passenger floor.
As you can see, I've threaded the rear
mounting bolts up from under the car which
makes installation a whole lot easier.
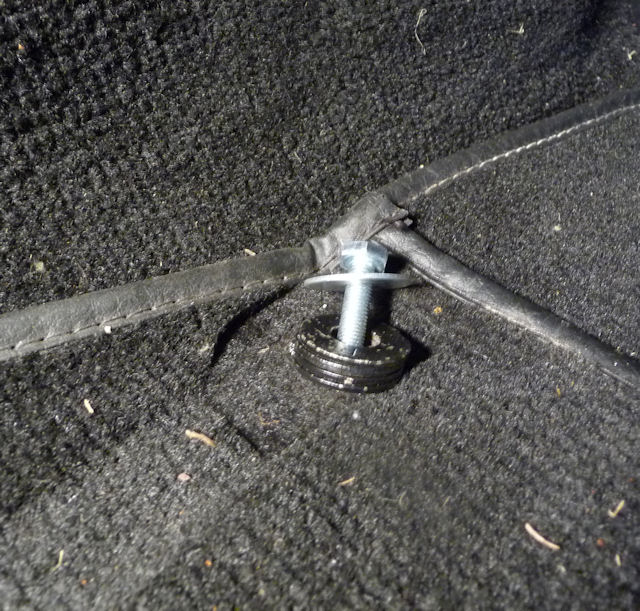
Inside Front has a spacer that goes between
the seat rail and the floor. This bolt uses
the stock TR6 mounting hole.
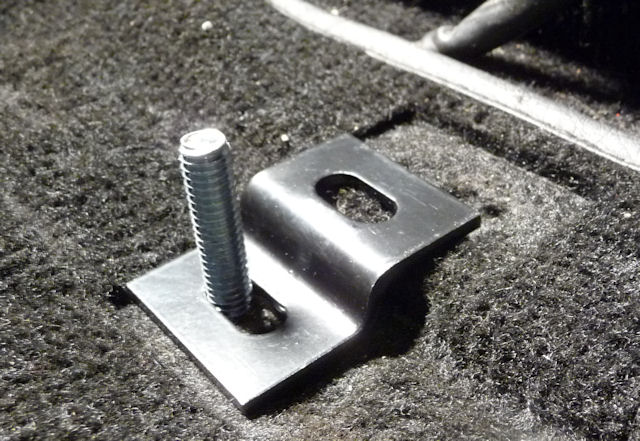
The Inside Rear bracket is bent to conform
with the bump in the floor. That floor bolt
was too long and I ended up using a 1" bolt
threaded up from under the car. The other
slot is where the Miata seat rail will
attach.
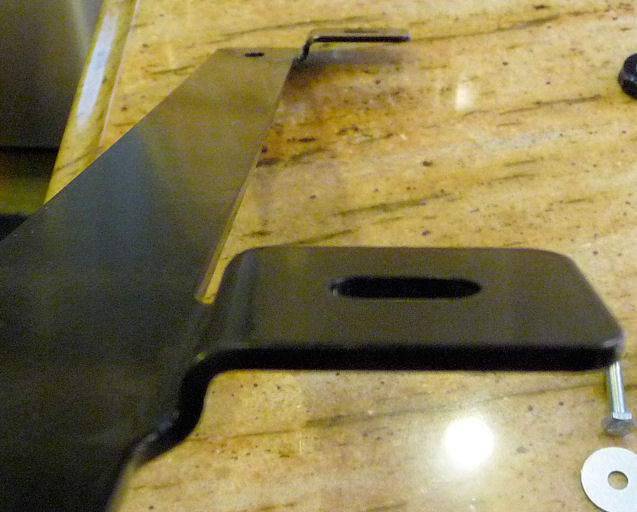
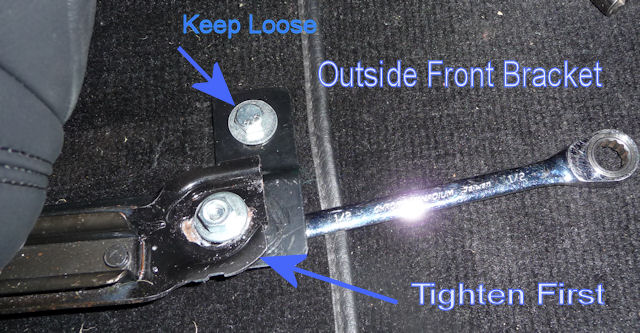
The outside front
bracket and the bolt using the stock TR6
mounting hole. The slot on the right is the
Miata seat rail mounting hole.
And the Outside Rear mount. This also ended
up being a 1" bolt threaded up from under
the car.
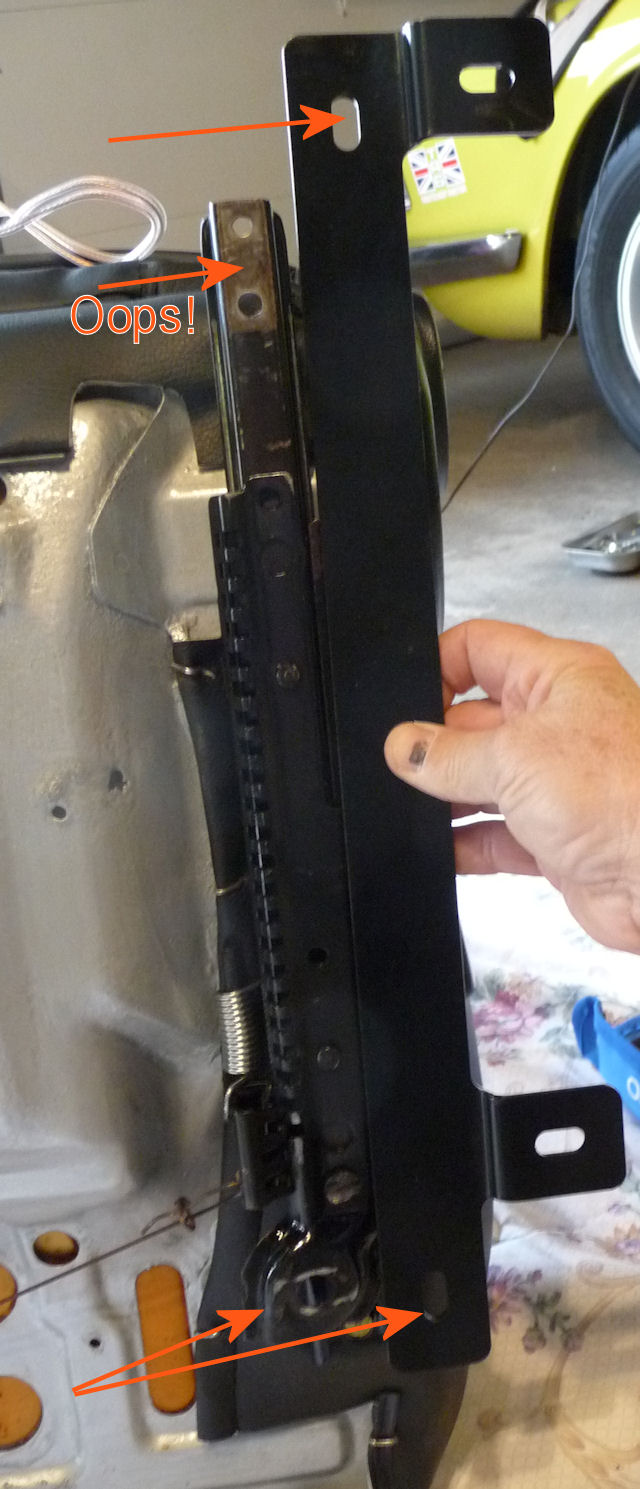
Because I had originally made up my own
brackets, I removed a piece from the Miata
seat rail on the left which would have
matched up with the slot on the
bracket...........but......no need to
worry..........see next picture.
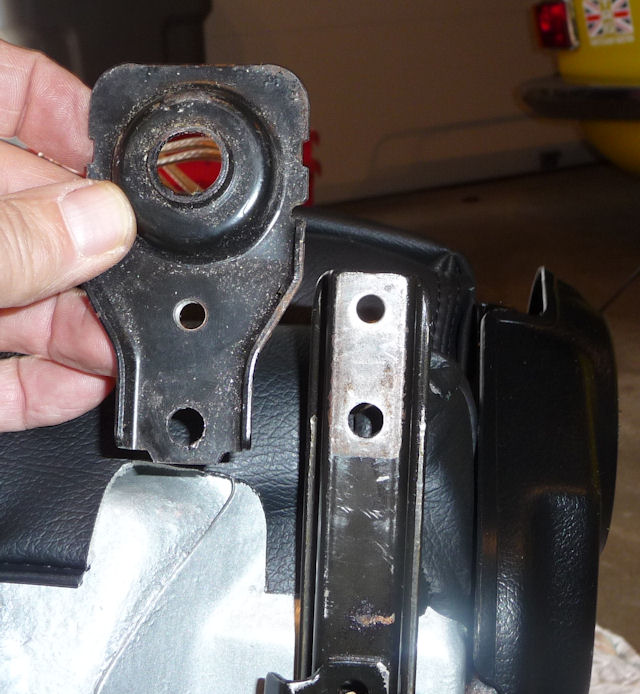
Guess what I
didn't throw out afterall!
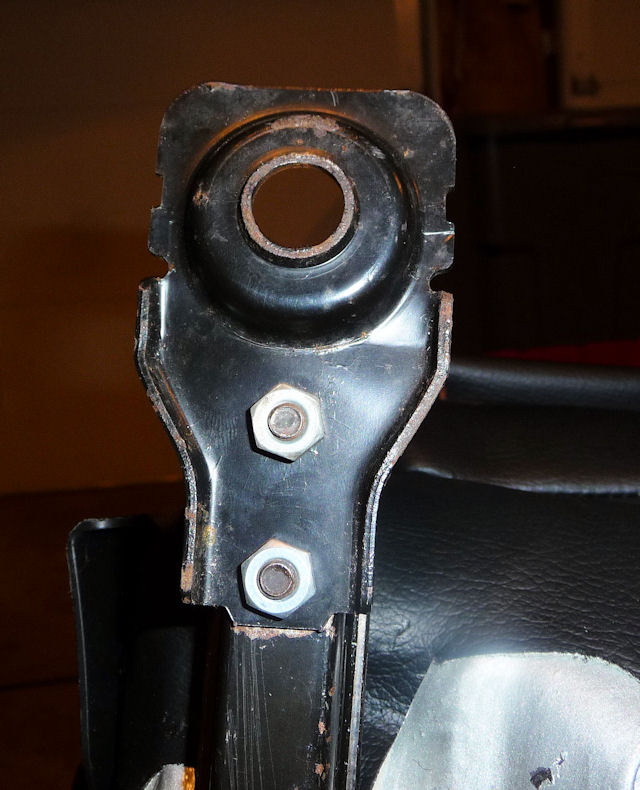
And here it is
bolted back into place. :-)
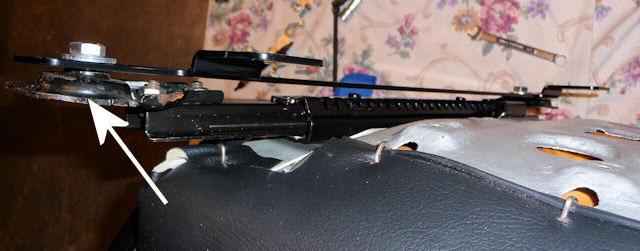
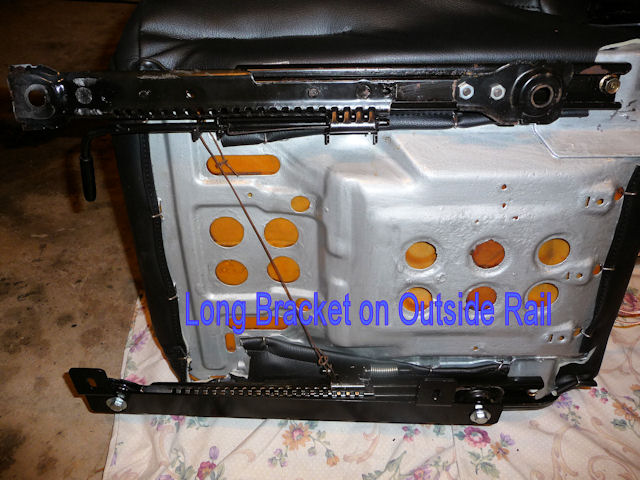
Here's the
bracket LOOSELY bolted in place.
Another view of
the long bracket
The short bracket
goes to the inside rear and is LOOSELY
bolted in place
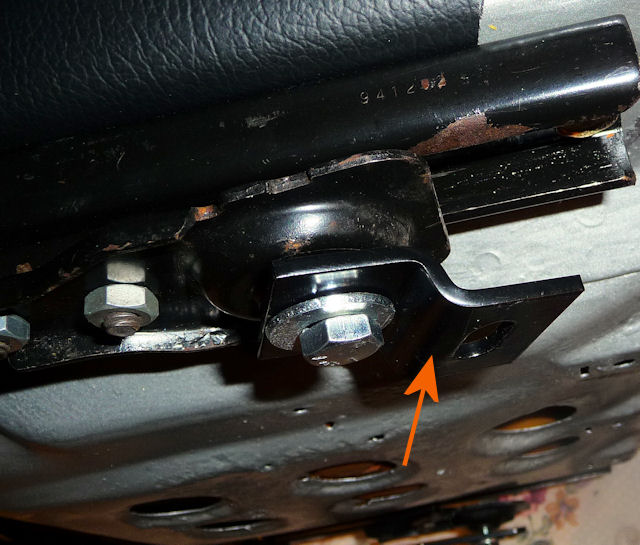
These seats are a tight fit but they will
fit, slide back and forth and recline with
no problem BUT.........they have to be
positioned as far to the tranny tunnel as
the brackets will allow. Otherwise the tilt
mechanism, which is on the door side of the
seat will hit the interior panel. The
picture below shows how tight the fit is
relative to the interior panel.
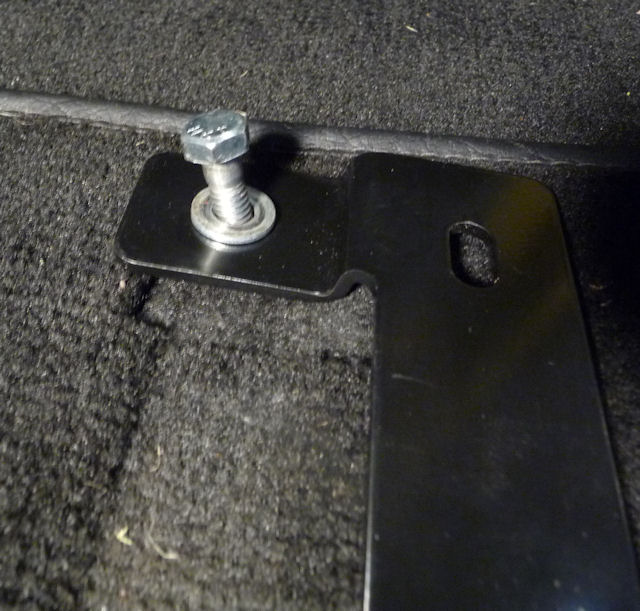
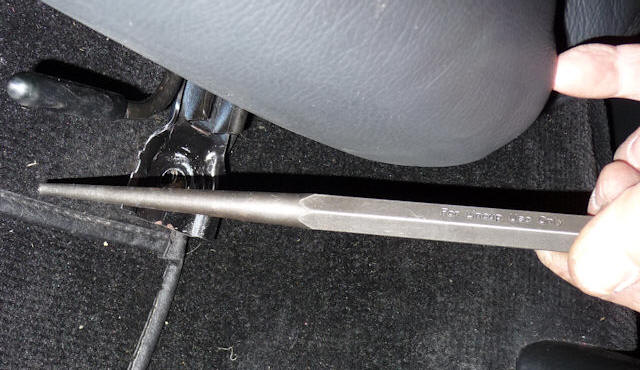
If you keep the floor bolt loose, you can
get a wrench under the bracket to tighten
that bracket nut.
A big awl or a
Philips Head screwdriver is a big help.
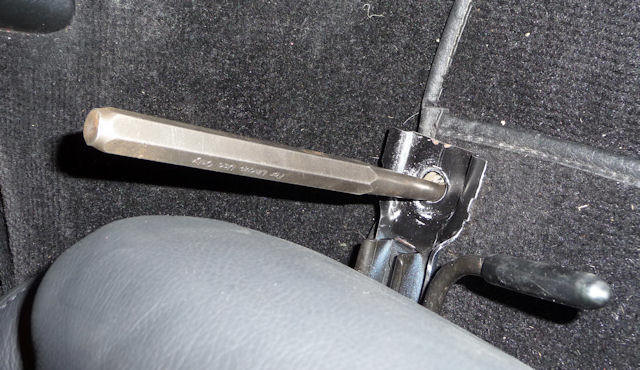
It helps to line
up holes!
Here's the front
all done.
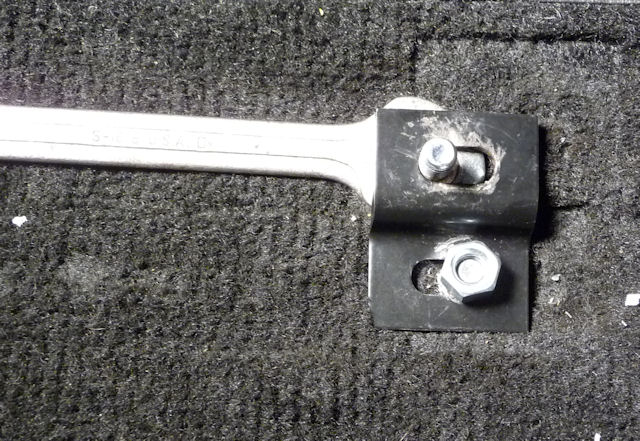
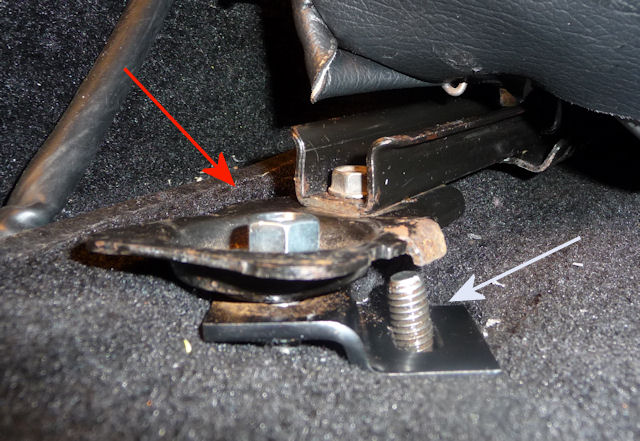
Keep the floor
bolt/nut loose so you can slip a wrench
under the seat rail bracket to catch the
bolt hear.
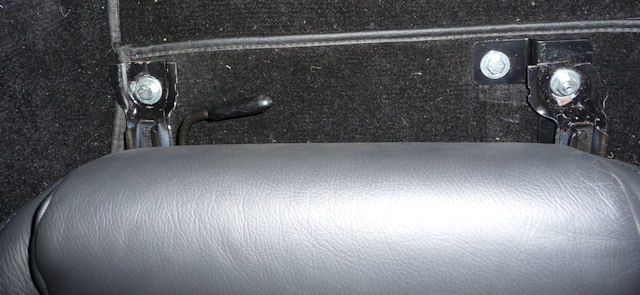
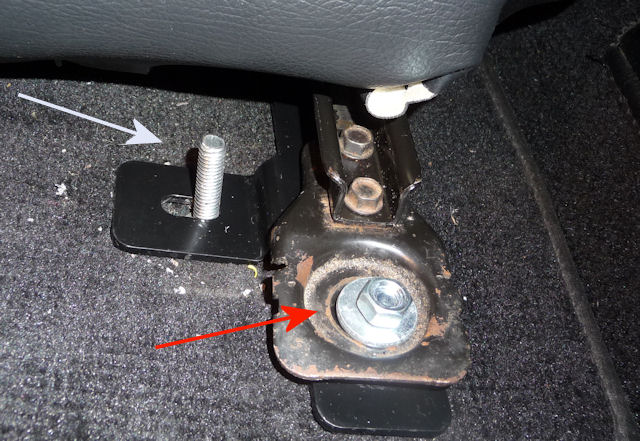
The outside rear needing a shorter bolt
(white arrow). Keep the seat rail nut (red
arrow) loose so you can slide a wrench under
the bracket. Once you tighten that down you
can tighten the bracket to floor bolt/nut
(white arrow).
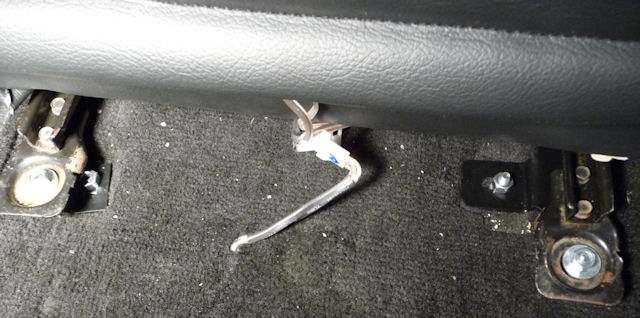
This is the Inside rear rail all set for the
floor nut to get screwed on............I may
have actually gone with a shorter bolt then
shown.
The rear is
complete.........now go and do the same
thing for the driver's side!
The kit
is pretty much a drop in installation but of course
I have a few suggestions/recommendations:
I
strongly recommend threading the rear bolts up
from underneath the car so that the threads are
protruding upward in the interior floor. This
makes the installation so much easier. The bolt
length will be dependent the thickness of your
carpet and underlayment. I ended up using 1-1/4"
fully threaded bolts slathered with anti-seize.
The outside rear bolts are a little tougher to
do as they have to go through the frame rail to
catch the bottom of the captive
nut............but it's still pretty easy to do
with some patience.
Loosely attach the long and short brackets to
the Miata seat rails. Pay attention to the bend
in the brackets........ the very first picture
below shows the proper orientation. The kitchen
counter would be the floor of the car.
The
Miata seats are a very tight fit but they do
fit. The only problem area is with the tilt
mechanism which is on the outside/door side of
the seat. If you don't have the rear of the
seats as close to the tranny tunnel as possible,
the hinge housing will be blocked by the
interior car panel and keep the seat from
sliding back...........or it will tear up the
vinyl on your interior panel. I pointed out this
concern to Joe and suggested that they modify
their rear brackets to allow for more lateral
movement.