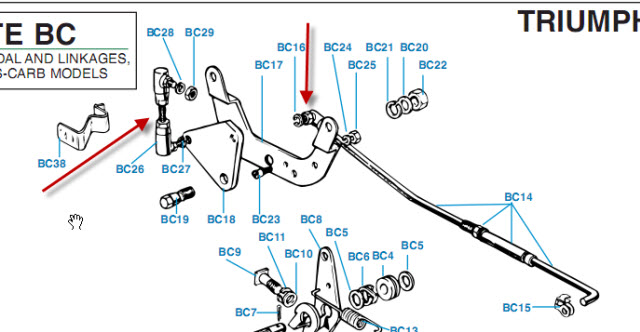
You can
remove these pieces by pulling out the cotter pin
and unscrewing the end a few turns to give the ball
a chance to pop out of the socket. As you'll see
later on there's actually a little spring loaded
piece in the socket that helps to maintain pressure
on the balls. Once you get these two pieces off
you'll be left with the three balls on the bell
crank and throttle linkage exposed. The socket on
the control rod has a lock nut that needs to be
loosened so you can unscrew the socket from the
control rod.
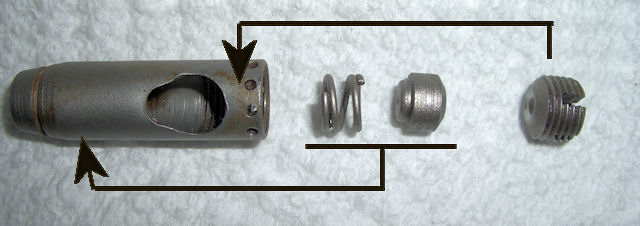
Now you
can take the socket apart, clean it and pack it with
bearing grease. As you can see below, there are four
components that come apart and need cleaning. I
packed the whole socket component with grease and
then inserted the spring and the spring cover. I
pushed it down with a small screwdriver to seat it
in place. The screw cap goes on next and is left
loose so that the ball end can fit in. As you can
see, the opening for the ball is not a perfect
circle.
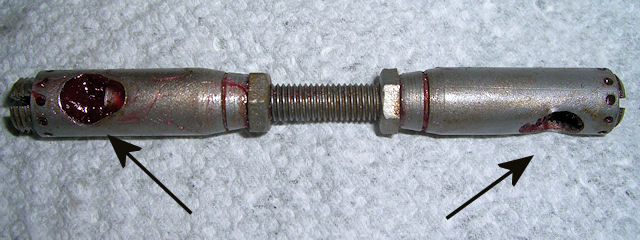
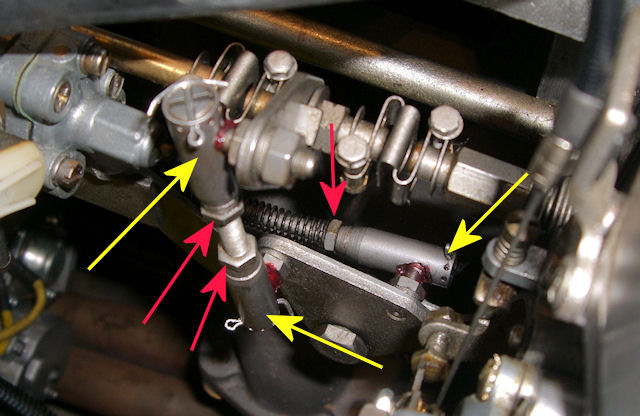
Here's
what the vertical one looked like after it was
cleaned and packed. The red arrows point to the two
locking nuts. I loosened these just enough to allow
me to unscrew the socket housing. You could even put
some duct tape over them to keep them in place so
you don't mess up the linkage settings.
Now it
was just a matter of reassembling everything. I
tighten those end cap screws until they're at least
flush with the socket housing. If you screw them
down too much you'll feel the linkage start to bind.
The most challenging part is lining the screw head
slots up with the holes for the cotter pin,
especially when you're working blind. Once it's all
together, it should look like this and operate
smoother then before. Don't forget to tighten the
three locking nuts down (red arrows).
If you've
never done this before, figure on spending 60 - 90
minutes from start to finish. I can usually get it
done in less then an hour. It will be time well
spent.