On each side of the car,
behind the doors are three snaps that the top and boot
cover attach to. These snaps are either installed with a
pop rivet or a sheet metal screw and over time and from
repeated use they loosen up and get wobbly. At least
that's been my experience. Then if you try to drill out
the rivet, the snap spins and messes up your paint. The
ones that use sheet metal screws are only as good as the
hole drilled into the body and they too loosen or strip.
Basically a bad design in my mind so I set out to find a
better way to attach the snaps without making it a
permanent attachment. I ended up settling on using rivet
nuts and snaps with a metal thread. It did require the
purchase of a special tool but............we can always
use more tools! I got the tool from
www.Jegs.com
and while it cost more at $98 it did come with a
complete assortment of seven mandrels (#6-32, 8-32,
10-32, 10-24, 1/4-20 & 5/16-18) that others charge
$20 apiece for! They also included an assortment of
rivet nuts.
The key to using these
successfully is getting the correct rivet nut with
respect to grip range. Every rivet nut has a
stated grip range and if the metal you're inserting them
into doesn't fall within that range, they won't hold.
Here's the ones from McMaster that I ended up using.
As you can see, you select by thread size or material
thickness size and then all the critical specs are given
including the drill bit size for the hole.
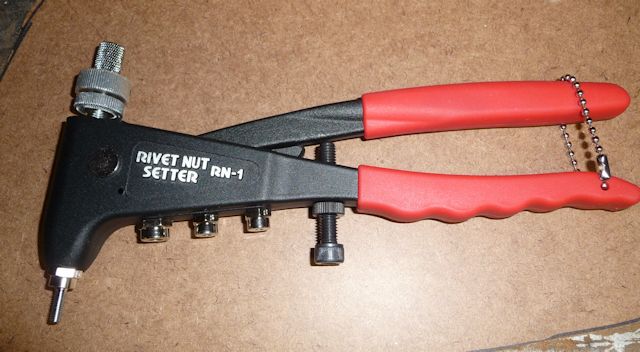
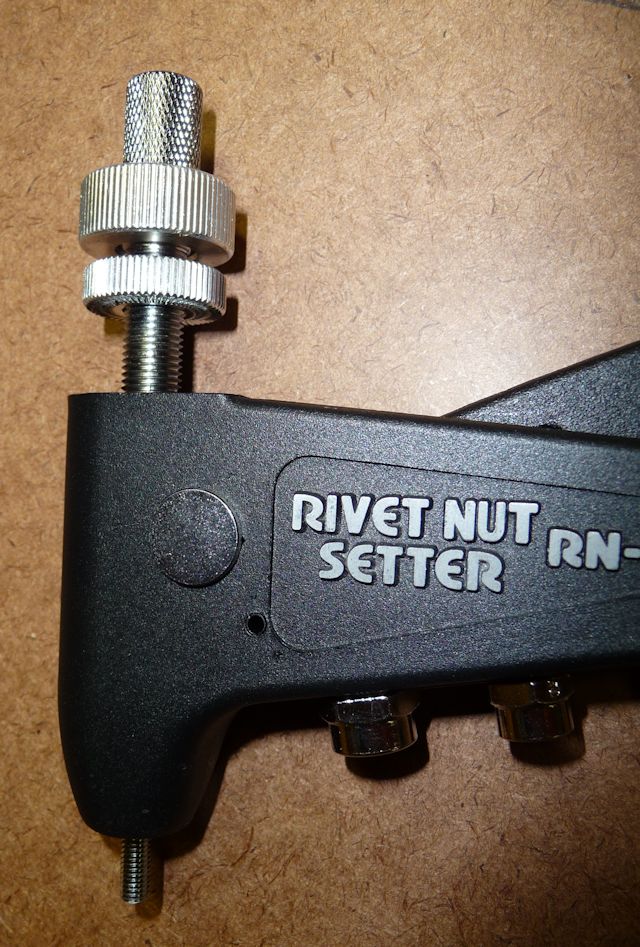
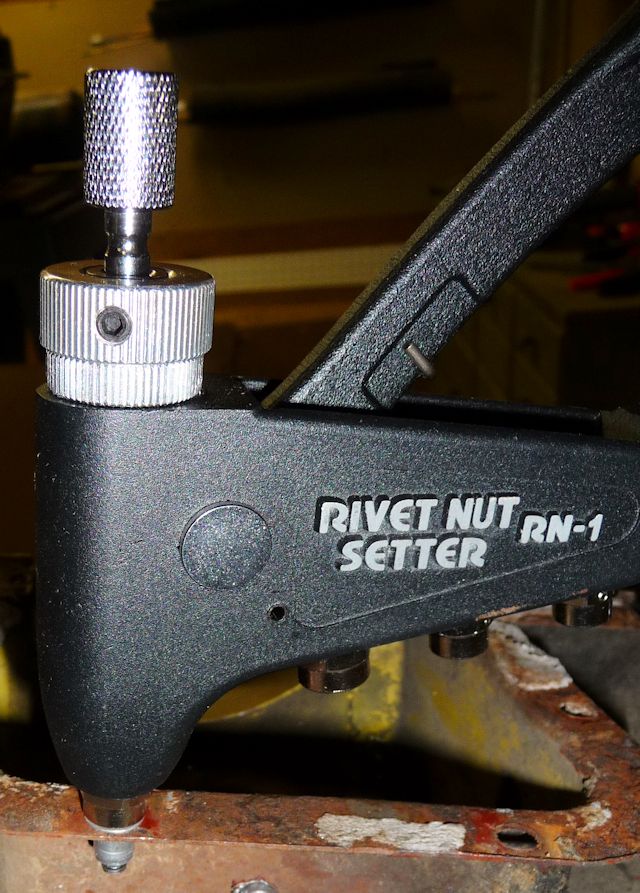
This
is the Jegs.com Tool
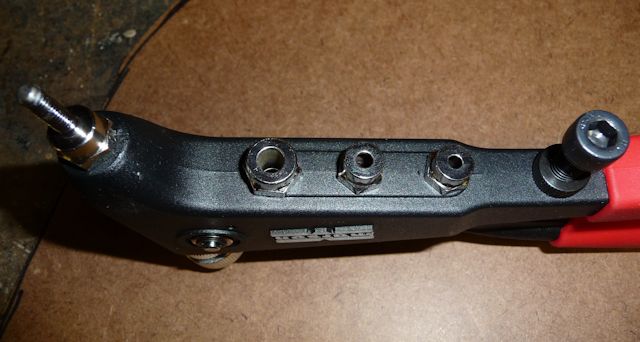
Various nose pieces for the various mandrels
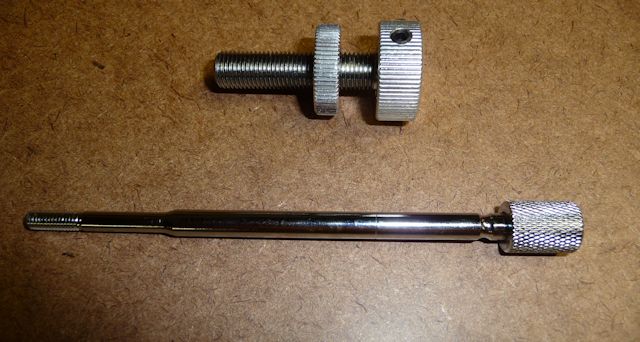
The
mandrel on the bottom is for a #10-32 threaded
rivet
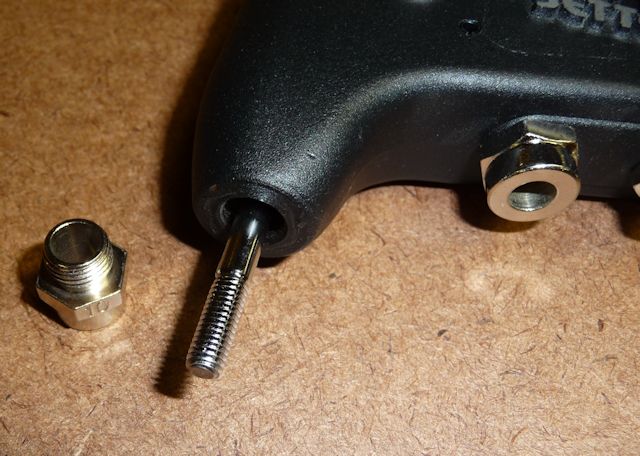
The
mandrel slides into this part
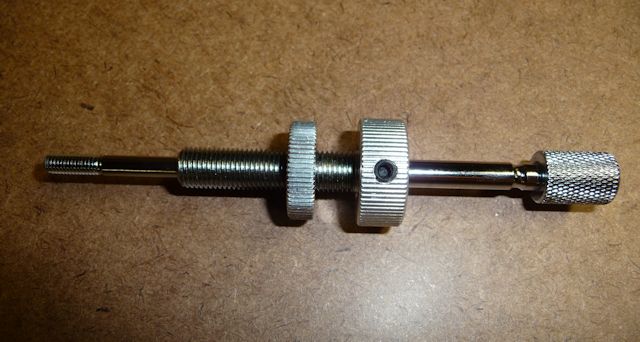
Then
it all screws into the tool
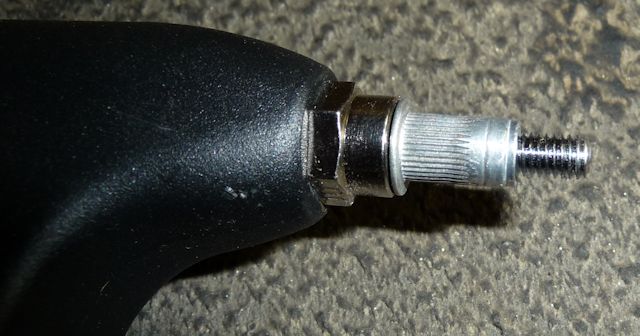
The
correct size nose piece gets screwed on to the
tool
and
the rivet nut screws on to the mandrel
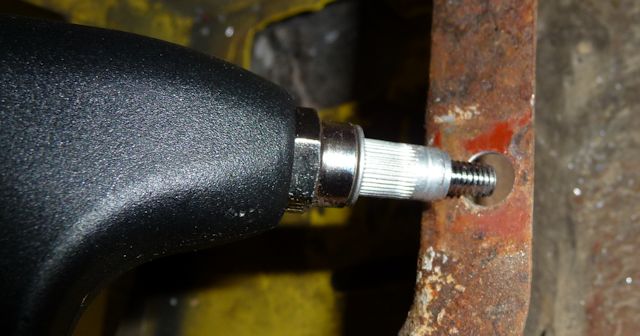
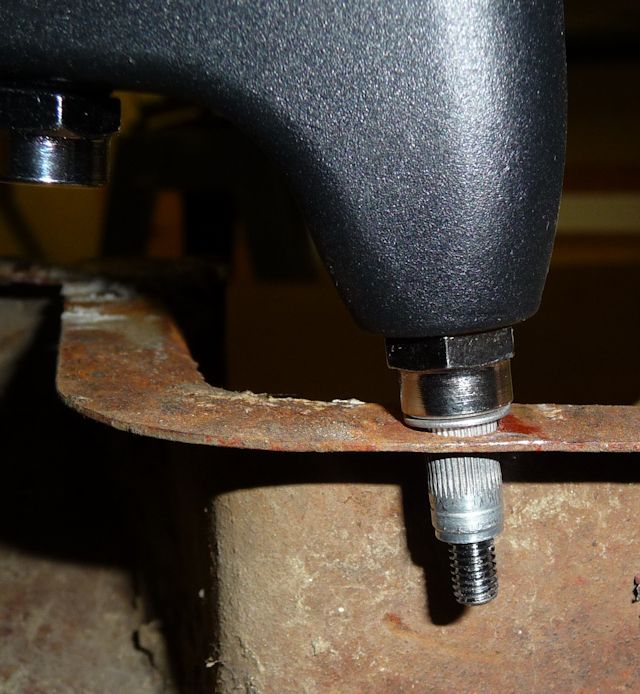
Put
it into a properly sized hole.....
Hold
it firmly in place and.........
Squeeze
the handles.....just like with regular old rivets.
Once it's solidly set, you just use that top
knurled knob to unscrew the mandrel from the rivet
nut.
All
done
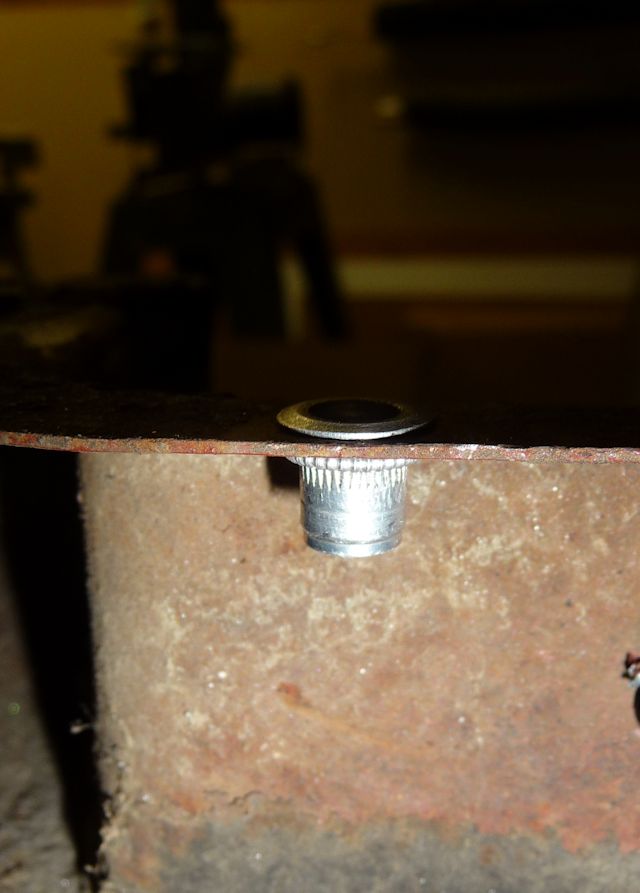
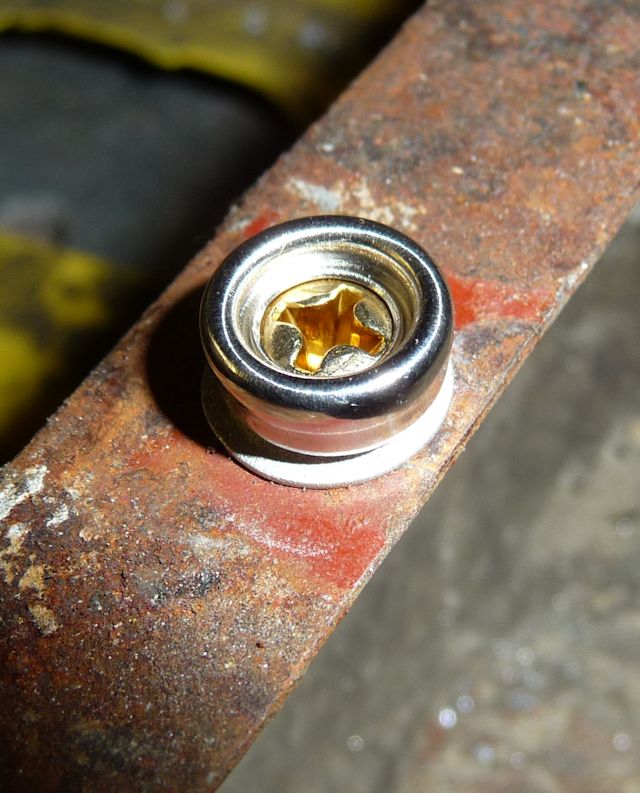
A
nice tight lip on the underside holds it in place
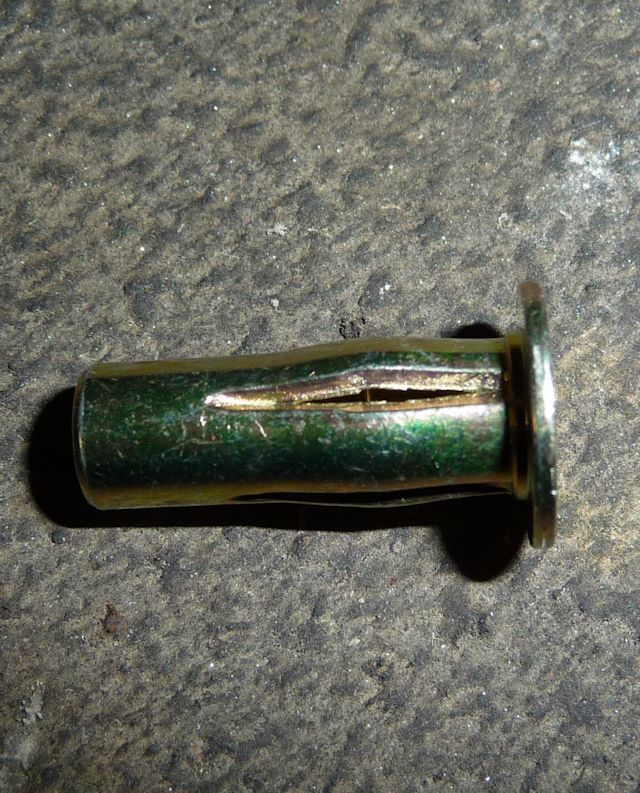
They
come in all shapes, sizes and purposes. This one
has long slotted sides that results in a super
strong connector. The slotted sides fold up into
wings on the underside.
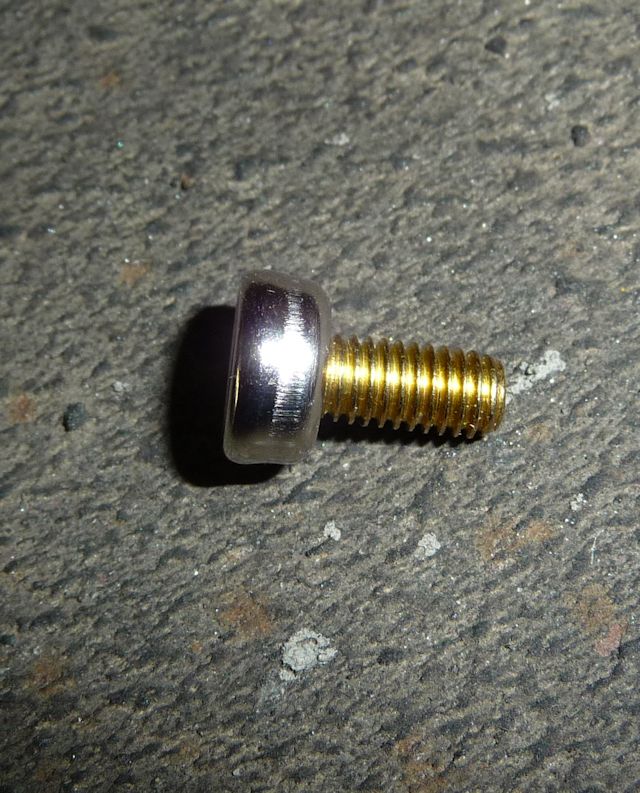
This
is the #10-32 threaded snap that I used
It
just screws in to place and doesn't wobble around
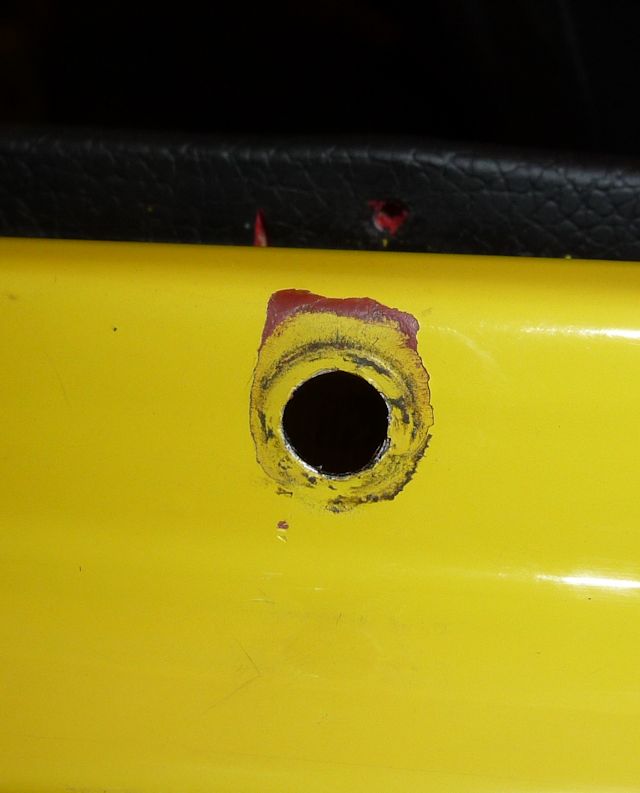
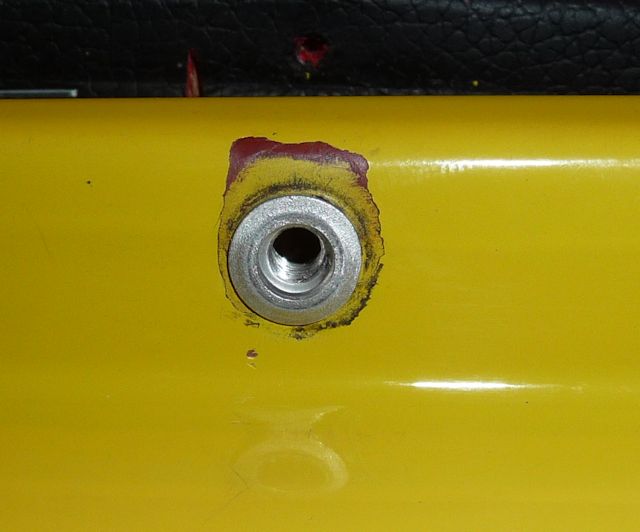
Drilling holes in my car always makes me nervous!
I did this in two steps starting with a smaller
drill and then the required hole size (9/32") for
the rivet. The paint is all chipped from the old
snap that moved around too much.
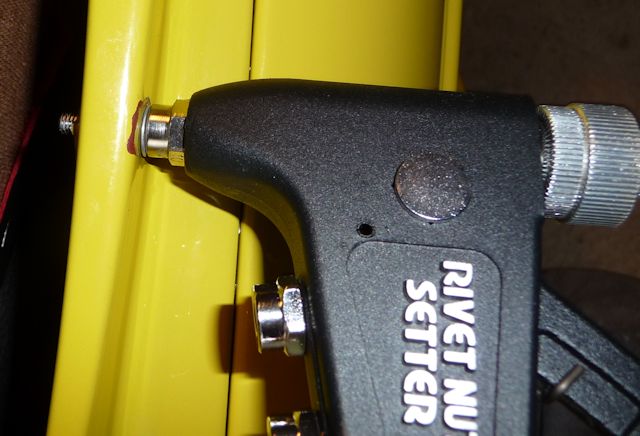
You can
see the end of the mandrel sticking through so
depth is a consideration when using this tool.
First one is done and solidly in place!
Whew.............
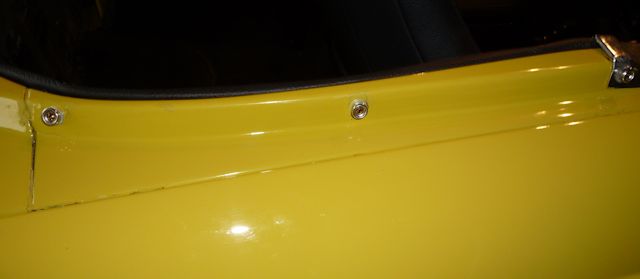
Here's
the finished product with all three done and touch
up paint applied. It actually makes it easier to
attach the top now.